Wednesday, 4 June 2014

Quick Guide to Estimate the Cost of Building a Retaining Wall

Most Retaining Wall Contractors will give free quotes, but it is always good to know more or less what you are in for before possibly wasting your and the contractor's time.

It's the quickest quote for me to do. All you got to know is how to calculate square meter and cubic meter.

For this guide, I'm referring to Concrete Retaining Blocks.


How do you calculate the amount of Retaining Wall Blocks you need?

You measure the length of the proposed wall and the height you want it to be. If the wall is less that 1.5m high, I'll add 0.3m to the height and 0.6m if it's higher than 1.5m.

This is because some blocks must be underground to improve the stability. Don't take short-cuts.

To get the square meter of the wall, multiply the height with the length. 

If you use Cape Brick's Retaining Wall Blocks, it takes 12 of their blocks to fill a square meter. So to get the amount of blocks for the wall, you multiply the square meter with 12.

It's about R25 per Smooth Face Block and R30 per Rockface Block, including delivery.

How do you calculate the cost of labour for Retaining Wall Installations?

My average labour cost per block is about R24. This includes supervision, labourers, fuel and admin costs. 

Factors that can influence labour costs:


  • Access to the site is difficult. Do you need a helicopter? Is it far from roads?
  • Uphill or downhill? Carting blocks uphill can be very tiresome and may ask for more labourers.
  • Filling. If there is plenty of filling, it could influence the tempo, thus will increase costs.
  • Natural obstacles. Underground water or huge boulders will influence the rate.


Extra costs that can add to your quote.

  1. Foundations - Most walls higher than 1.5m require a concrete or stabilized foundation. To be safe, work on R250 per meter.
  2. Filling - This is the most difficult calculation. I recommend you make a drawing. Work on R200 per cube, including labour.
  3. Sub-soil drains - If you use the system I recommend, you can look at R80 per meter excluding filling.
  4. Compaction - When the filling area is wider than 1 meter behind the block, I'll use a forward reverse, but don't come to close to the blocks, as the compactor will move the blocks. Rather use a hand compactor. Work on R450 per day.
All you got to do now is to add all together in an excel sheet. If you can afford what you get, you can now ask Retaining Wall Installers for quotes.

Amazing Alien Looking Creature Poisoned Me

Wednesday, 28 May 2014

How to do Sub-Soil Drains Cheaper.

First of all, sub-soil drains is also known as french drains or "sifdreinering" in Afrikaans.

We use it to drain excessive underground water from your property, sportfields or roads. So if your garden is waterlogged or there is damp deposits on your walls, it's time to install some sub-soil drains.

For years I did it the old conventional way:

  1. Dig a trench,
  2. Put bidim in the trench, of which the width is at least 2m,
  3. Install perforated pipe,
  4. Fill with 19mm stone and compact,
  5. Cover bidim over stone and level with existing soil.


Then one day, I got a Retaining Wall Installation in Hout Bay. Water was seeping out of the embankment like I've never seen before and I asked a geotech specialist for advise on drainage.

His advise was to use this new system, I'm going to share with you. It not only drains away water faster, but is also way cheaper than the conventional method.

The new method:

  1. Dig the trench,
  2. Rap a 500mm wide bidim sock around the 110mm pipe and install,
  3. Fill and compact with clean white filling or building sand,
  4. Level.

So where do you save?
  1. You need less bidim,
  2. Sand is 3 times cheaper than stone.
Other advantages is that it's easier to install and last longer.

After completion of the above mentioned retaining wall, it drained about 600 litres per hour.


D.I.Y. Irrigation Installation. How Much Do You Save?

I did my first irrigation installation in Van Riebeeckshof, Bellville back in 2001. I can remember being impatient and not waiting for my supplier's rep to show me the ropes. Instead, I tried to connect the manifold to the main waterline myself. When I opened the stop-cock, the water pressure popped the manifold right off and sprayed water and mud all over my clothes.

To make things worst; there were 3 guys in a Nissan 1300 bakkie, that witnessed the whole episode. They couldn't stop laughing. I closed the valve and disappeared to the back garden. When I came back after about 20 minutes, they started laughing all over again. I couldn't help but to join them.

My second job was way easier, in fact things just got better from then and it's second nature now. If you are a D.I.Y. person, you may have better luck, but is it worth doing it yourself?

I'm going to list the Pro's and the Con's, but not in that order. I'll start with the Con's.

The Con's:

  1. Irrigation Contractors get up to 40% discount on irrigation parts. That amount is more or less equal to the labour. So if you decide to DIY and don't get the products at the discounted price, you might as well get a professional contractor to do the installation.
  2. You got to do a lot of research before commencement. Do you know what's your water pressure? How many pop-ups can you put on one line? Do you know how to connect the Controller to the Valves? How do you assemble a manifold?
  3. Installers usually have extra fittings. If you're new to irrigation or don't do it often, you tend to exclude things you didn't think of and will do several trips to the supplier to buy that "things".
  4. It will take you way longer to complete, especially if you dig the trenches yourself. An average home irrigation installation take us 1-2 days. I will take a single person at least 4 times longer.
  5. You miss out on 4 days, you could have spend with your family and friends.
The Pro's:

  1. There is a chance that you'll save money, if you get a discount on the parts.
  2. The satisfaction after completion of your own installation when it works.
As you can see it all depends on what type of person you are.

If you're not the DIY type. Give me, Mark, a call for a free irrigation quote at 0829275169 or email me at creative@vodamail.co.za

Monday, 26 May 2014

5 Reasons Why You Must Start Your Own Home Nursery

I'm going to jump to the reasons I believe you should start your own home nursery. My initial goal was to start a Wholesale Tree Nursery and in the process supply my own Landscaping Business.

What happened was that I got hooked, treating my plants better than my dog, talking to them and visiting them at least a couple of times per day.


So why should you?
1. You learn more about a plant's character, than you read in any book. Plants that I used to plant in full-sun, I now know does better in semi-shade or morning sun. You learn which plants to grow from seeds or cuttings.
2. It is a great hobby to keep you out of trouble and your kids can join in the fun. 
3. It's a great way to relief some stress. Especially when you see new growth.
4. Contribute to the environment. Plant indigenous trees or plants that release high volumes of oxygen in the air, like Portulacaria afra.
5. Grow your own organic Fruits and Veggies. As soon as you invest in something it's got a value. You will treat your Fruits and Veggies like gold. I almost fired my garden service for stealing my avocado's.


I hope I convinced you. Please comment on your experiences.

Sunday, 25 May 2014

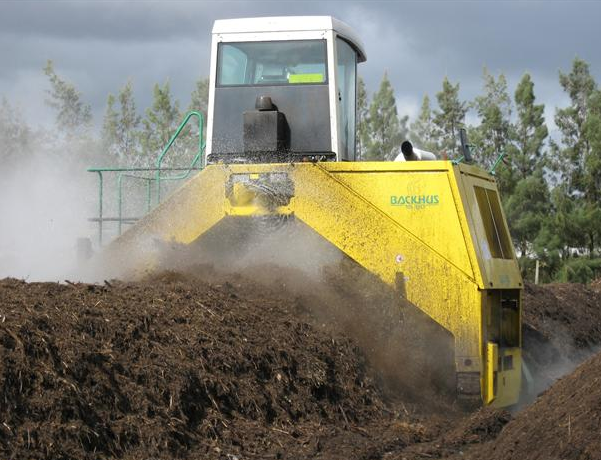
Don't Ever Buy Compost From the Street

When you're new to gardening and want to feed your beds and lawn with some compost, it's easy to fall prey to the "Bakkie Suppliers". They go door-to-door selling compost at a good price. Weeks later your lawn is covered in weeds and the lawn looks worse of than before.

Not far from my home, their are hawkers selling bags of compost and plants. If you decide to take a chance with hawkers, avoid "Kraalmis", because it usually contains weed seeds.

The fact is, you don't know what you get. I recommend going to the Big Boys with a proven track record. They sell a variety of products to suit your needs.

For years I only believed in Eco-Gro. Their product was phenomenal and you could hear the plants grow. Unfortunately, they were closed down due to some safety issues and I had to look elsewhere.

Luckily, there are other great suppliers, who's products are safe and clean. Here's my list:

  1. Reliance Compost 100% Certified Organic Compost

    2. Agri OrganicsMother Nature's Farming Friend.
    3. Stanler FarmsWhen the compost hits the fan, it's the quality of the product that counts.

Saturday, 24 May 2014

Where to Buy Great Pots for Your Garden.

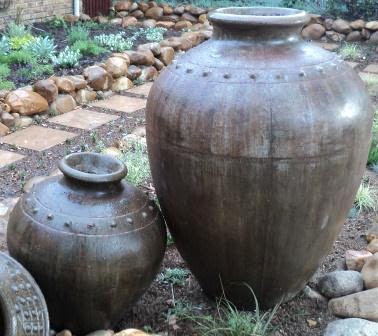
Pots are a must when there is sufficient funds allocated for the landscaping budget of a property. The bigger the property, the bigger the pots. It just adds character and value to your outdoors. Look at the pictures below. I must say, I got carried away and bought R40,000-00's worth of pots on this site, but can you imagine small pots against these high walls?


What I Look for When I Buy Pots.
  1. It must look natural. Everyone has different tastes and I will personally never use very colorful pots outside. I go for earthy colors.
  2. I don't want to see paint stripes or red oxide stains on pots. A pot can so easily look kitsch and will negatively influence your overall look.
  3. I must like the design and prefer manufacturers with a wide variety.
Here's My List of 3 Preferred Suppliers.

  1. Desert Pots - They are my favorite supplier. Their pots are also very affordable.        


    They were recently bought by the owners of Elemental Pots and you can look at both ranges at one promise.

    2. Cape Garden Centre - I love their great service, the quality of their plants and their large variety of pots and other landscaping products.
    3. Habitat - Although they're not known for their pots, but rather their huge tree nursery, I love their range. Expensive though, but as natural as you can get.


    If you know of a pot suppliers that's worth a visit, please comment on this article. I'm always open to new styles.